Interior restoration is one of the most cost-effective ways to add value and comfort to a classic car or truck. Whether you’re working on a worn-out bench seat, faded carpet or sagging headliner, do-it-yourself (DIY) restoration offers control, savings and satisfaction. With the right tools, materials and patience, you can get factory-style comfort on a set budget.
This guide focuses on restoring classic car interiors as well as classic truck interior restoration using proven techniques. From material sourcing to proper installation, here’s how to determine your budget and start the restoration process.
Assessing the Damage
A thorough inspection is critical before starting a classic truck interior restoration project. Interior wear varies by vehicle age, usage and storage conditions. Accurately identifying problems helps determine whether simple fixes or full replacements are necessary. Common problem areas include:
- Seat covers: Look for torn upholstery, cracked vinyl or faded cloth. Pay close attention to side bolsters, stitching and high-contact areas.
- Seat foam: Press down on the seat base and backrest to feel for compressed or crumbling foam. Sagging or uneven support is a clear indicator of deterioration.
- Carpet: Check for stains, fading, moisture damage or wear-through, especially near pedals, under seats and in footwells.
- Sound deadening and padding: Lift a section of the carpet to inspect the padding. Signs of mold, odor or water intrusion suggest deeper damage.
- Hardware and trim: If applicable, inspect seat tracks, recline mechanisms and plastic trim panels for function and completeness. Note any missing hardware for sourcing.
Once the scope of damage is documented, the restoration plan should prioritize safety, such as securing seat frames. After that, you can address visible wear. Match your strategy to your budget and time frame.
Choosing the Right Approach
Deciding whether to restore or replace interior components depends on the part’s condition, material type, cost and your end goal. Small cracks or faded areas may be fixable, but severe wear, structural damage or missing parts usually require replacement. Keep in mind that replacements offer better long-term value, especially for high-wear parts.
Setting a Budget
Setting a budget for a DIY classic truck interior or car interior project begins with a clear assessment of the vehicle’s condition and restoration goals. From there, prioritize restoration based on safety, function and appearance. Set goals by deciding which areas need full restoration, functional fixes and aesthetic upgrades.
Research prices on supplier websites, and be specific about the year, make, model and trim level for each part. For example, you’ll need a specific dash pad for your 1967-1972 Chevy or GMC pickup. List necessary tools and supplies, too, from adhesives to fasteners, trim tools and potential tool rentals.
Seating Restoration Options
Seating restoration starts with assessing the damage. Minor wear, small tears in upholstery or sagging padding typically warrant a restoration. You can fix small tears with leather or vinyl repair kits. For large-scale damage, you may need to replace the seat covers or even the full seats if the frame is damaged or broken. A complete replacement is recommended if the seat frame is rusted or broken, or if the upholstery is too damaged for patching. For collapsed padding, use molded seat replacements and weld cracks in the frame.
Use fabric or leather-specific cleaners to clean upholstery and remove stains. Steam extraction works well for cloth, while leather and vinyl respond to foam or gel cleaners.
Carpeting Restoration Options
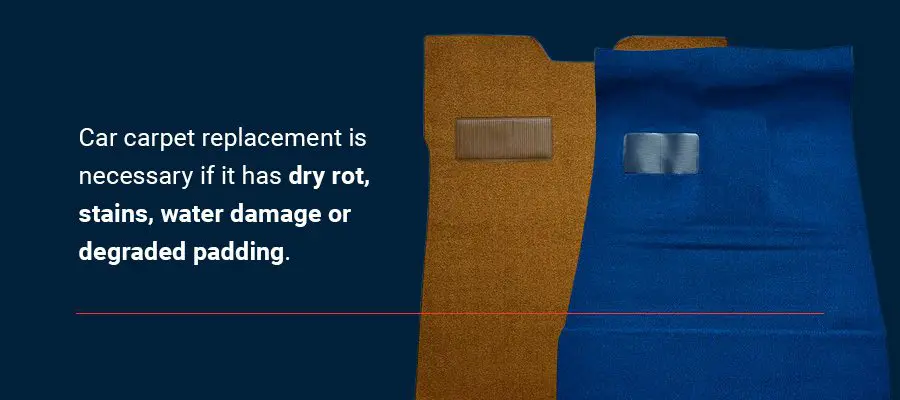
Car carpet replacement is necessary if it has dry rot, stains, water damage or degraded padding. Installation requires:
- Removing seats, kick panels and sill plates.
- Cleaning and treating the floor pan for rust.
- Laying down jute padding.
- Aligning the molded carpet.
The material, usually loop or cut-pile, is available in factory colors and backed with sound-deadening jute for insulation and fitness.
If there are small rips or burns in otherwise intact carpet, use a patch kit matching its color and texture. Cut the patch to fit, glue it in place with high-temperature automotive adhesive, and hide the seams under factory molding. Deep clean the rest of the carpet with a hot water extractor and carpet shampoo. Surface stains may lift with a brush and spot remover.
Headliner Restoration Options
You can fix the headliner if there is minimal sagging and the fabric is still pliable. If the headliner is foam-backed cloth, which is common in vehicles from the 1970s through the 1990s, re-glue the original cloth with high-temperature headliner adhesive. When the board is broken or warped, or the fabric has deteriorated, you need a full replacement.
For board-type headliners, removal involves detaching the trim, pulling the board, cleaning it and covering it with new fabric using spray adhesive. Proper fitment requires aligning the seams with bow locations and using a heat gun to remove wrinkles. Replacement bows and backing boards are available for most classic and domestic cars.
Sourcing Materials and Tools
Select high-quality, vehicle-specific parts and tools from trusted restoration suppliers. Look for a supplier offering model-specific parts, a U.S.-based inventory, technical support and clear product listings with fitment details. Recommended tools and materials include:
- Seating: Use hog ring pliers, hog rings, seat foam and seat upholstery kits.
- Carpeting: Source trim removal tools, a utility knife, jute padding, high-temperature spray adhesive and a molded carpet kit.
- Headliner: Stock up on screwdrivers, trim tools, headliner adhesive, a heat gun for bow-style installs and pre-cut headliner board or fabric.
Tips for Saving Money
DIY classic car or truck interior restoration can significantly reduce expenses, but proper planning and part selection are key to avoiding costly errors. Money-saving strategies include buying complete kits over individual components and buying model-specific parts to ensure proper fitment and avoid problems.
Buy High-Quality Interior Restoration Parts From Raybuck
Successful interior restoration requires the right tools, the correct parts and some attention to detail. Whether you’re fixing cracked seat foam, replacing worn carpet or installing a new headliner, prioritizing restoration budgets and partnering with a reliable supplier can deliver professional-grade results.
Since 1985, Raybuck Auto Body Parts has provided customers with high-quality vehicle parts at reasonable prices. We offer interior replacement parts that meet OEM specifications, such as vinyl and carpet flooring and reupholstery kits. Thanks to the Raybuck Advantage, we ship in-stock orders within two business days and most special orders within three to five business days.
Shop interior truck parts and accessories, or contact us today to find the replacement interior parts your project needs.


