Rocker panels are an essential part of your truck’s structure. They protect the lower body from road debris, salt, and moisture, and help maintain the vehicle’s strength and safety. Over time, these panels can rust or become damaged, especially if you drive in areas with harsh winters or unpaved roads.
Replacing them can seem intimidating, but with the right tools, preparation, and high-quality parts from Raybuck Auto Body Parts, you can complete this repair yourself. By tackling the job at home, you save on labor costs, prevent further damage, and restore both the look and integrity of your truck.
Key Takeaways
- DIY rocker panel replacement helps prevent rust from compromising your truck’s structure.
- Raybuck Auto Body Parts offers heavy‑gauge stamped steel panels that fit precisely.
- Choose between welded or slip‑on panels based on damage severity and your available tools.
- Gather essential tools and materials—like grinders, clamps, safety gear, rust inhibitor—before starting.
- Proper fitting, rust protection, and finishing ensure a durable repair and cost savings compared to professional work.
Removing rust before installing a replacement panel prevents corrosion from spreading—key for long-term results.
Why Fix Rocker Panels Yourself
When rocker panels start to rust, the damage can spread quickly to the truck’s frame and floorboards. Left unattended, this can compromise safety and lead to costly repairs. Replacing rocker panels yourself offers several benefits:
- Significant labor cost savings compared to professional body shops
- Control over the quality of materials used
- Immediate action to stop rust before it spreads further
With Raybuck Auto Body Parts, you get heavy-gauge stamped steel panels built for an exact fit, making installation more straightforward. This do-it-yourself approach ensures your truck stays on the road longer without the high price tag of professional work.
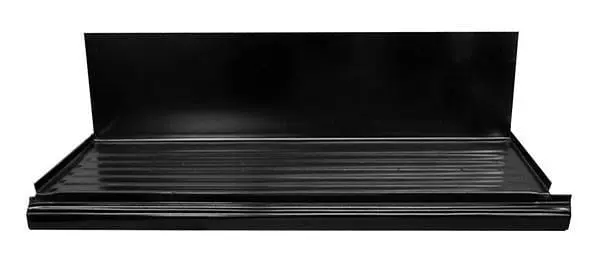
Types of Replacement Panels
There are two main types of rocker panels available through Raybuck Auto Body Parts:
Welded Panels
Welded panels require complete removal of the old, rusted panel. The new panel is welded in place, restoring full structural integrity. This option is ideal for severe rust damage where the original panel cannot be saved.
Slip-On Panels
Slip-on panels are designed to fit over existing rocker panels. They can be attached using rivets or panel adhesive, which means less cutting and no welding for installation. This option is better suited for moderate rust damage and for those who do not have welding experience or equipment.
Both options require proper surface preparation and rust treatment before installation. Choosing between them depends on your level of damage, skill set, and available tools.
Tools and Materials Checklist

Before starting, gather the necessary tools and materials:
- Angle grinder
- Wire brush or drill with wire wheel attachment
- Spot weld cutter or drill bit
- Clamps
- MIG welder (for welded panels)
- Safety gear: gloves, safety glasses, dust mask, ear protection
- Rust inhibitor (Zero Rust is a recommended choice)
- Body filler and spreader
- Sandpaper
- Primer
- Automotive paint and clear coat
Having everything on hand before beginning ensures you can work efficiently without interruptions. Safety equipment is just as important as your tools to protect you while working with metal, chemicals, and power equipment.
DIY Repair Step-by-Step
Step 1: Assess and Prepare
Inspect your rocker panels thoroughly. Determine if the rust is surface-level or if the metal has corroded through. Decide whether welded or slip-on panels are more appropriate based on the extent of the damage.
Step 2: Remove the Damaged Panel
For welded panels, use an angle grinder to cut away rusted areas and a spot weld cutter to separate the panel from the truck’s body. Be thorough in removing all rust, as any remaining corrosion can continue to spread. For slip-on installations, grind away loose rust and clean the surface well.
Step 3: Fit the New Panel
Test-fit your replacement panel to ensure correct alignment. For welded panels, tack weld in several places before completing a continuous weld. This prevents heat distortion. For slip-on panels, align carefully, clamp in place, then secure with rivets or adhesive according to manufacturer instructions.
Step 4: Finish and Protect
After installation, clean all surfaces and apply a rust inhibitor to exposed areas. Use body filler to smooth seams, sand to an even finish, and then prime and paint the repaired area to match your truck’s existing color.
Choosing the Right Panel and Ordering
Raybuck Auto Body Parts makes it easy to find the correct rocker panels for your truck. Use the website’s year, make, model, and cab type filters to narrow your options. Many panels are offered in heavy-gauge steel with protective coatings like EDP or galvanized finishes, which add durability and corrosion resistance.
If you are unsure which panel fits your needs, the Raybuck customer service team can guide you to the right choice. Having the correct panel ensures a smoother installation process and better long-term performance.
Conclusion: Rocker Panel Replacement Guide
Replacing your truck’s rocker panels yourself is a rewarding project that restores both the appearance and strength of your vehicle. With the right tools, proper preparation, and quality parts from Raybuck Auto Body Parts, you can complete this repair without professional help. Whether you choose welded or slip-on panels, addressing rocker panel damage early prevents more expensive repairs down the road.
Raybuck offers the durable products and knowledgeable support you need to keep your truck in top condition. Take control of your repairs, protect your investment, and enjoy the satisfaction of a job well done.
Explore Raybuck Auto Body Parts for the quality replacement rocker panels and expert guidance that make this repair achievable at home.
Further Reading
- How to Replace Rocker Panels on a Car: A DIY Guide: Step‑by‑step instructions on rocker panel replacement using welding or riveting.
- The Most Affordable Ways To Repair Rocker Panels: Covers DIY repair options, sourcing used parts, and preventive rustproofing.
- Replacement Guidelines and Timing for Rocker Panels: Explains when panels need replacing, signs of damage, and maintenance tips for longevity.


