
Quick Links:
Tools Needed to Remove Your Inner Door Panels:
These are the basic tools you will need to complete the project:
- 6 mm socket
- 8 mm socket
- Ratchet or drill & adapter
- Hooked or pronged tool for pulling
- Small flathead screwdriver for prying plastic covers
- A flashlight or floor light
Depending on what you will be doing once the door panel is off — for example, if you are replacing speakers or the handles — you might need other specific tools as well.
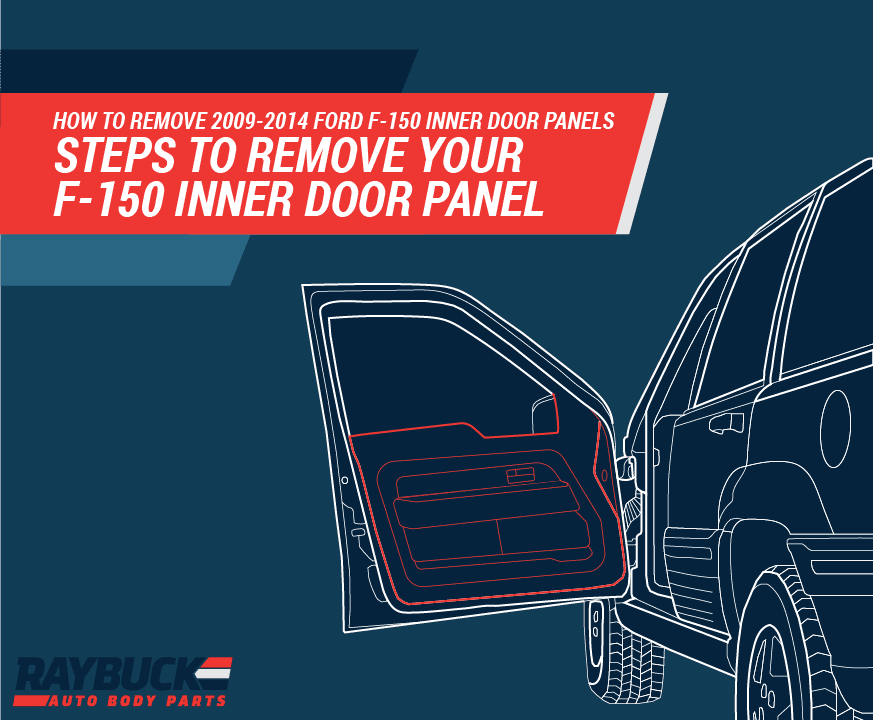
Steps to Remove Your F-150’s Inner Door Panel:
Follow these steps in the correct order to ensure your door panel is loose before attempting to lift it off to avoid damage. We suggest fully disconnecting all of the switch connectors at the end to completely remove the door panel. Leaving it hanging while you work on the door can damage the switches and wiring:
-
-
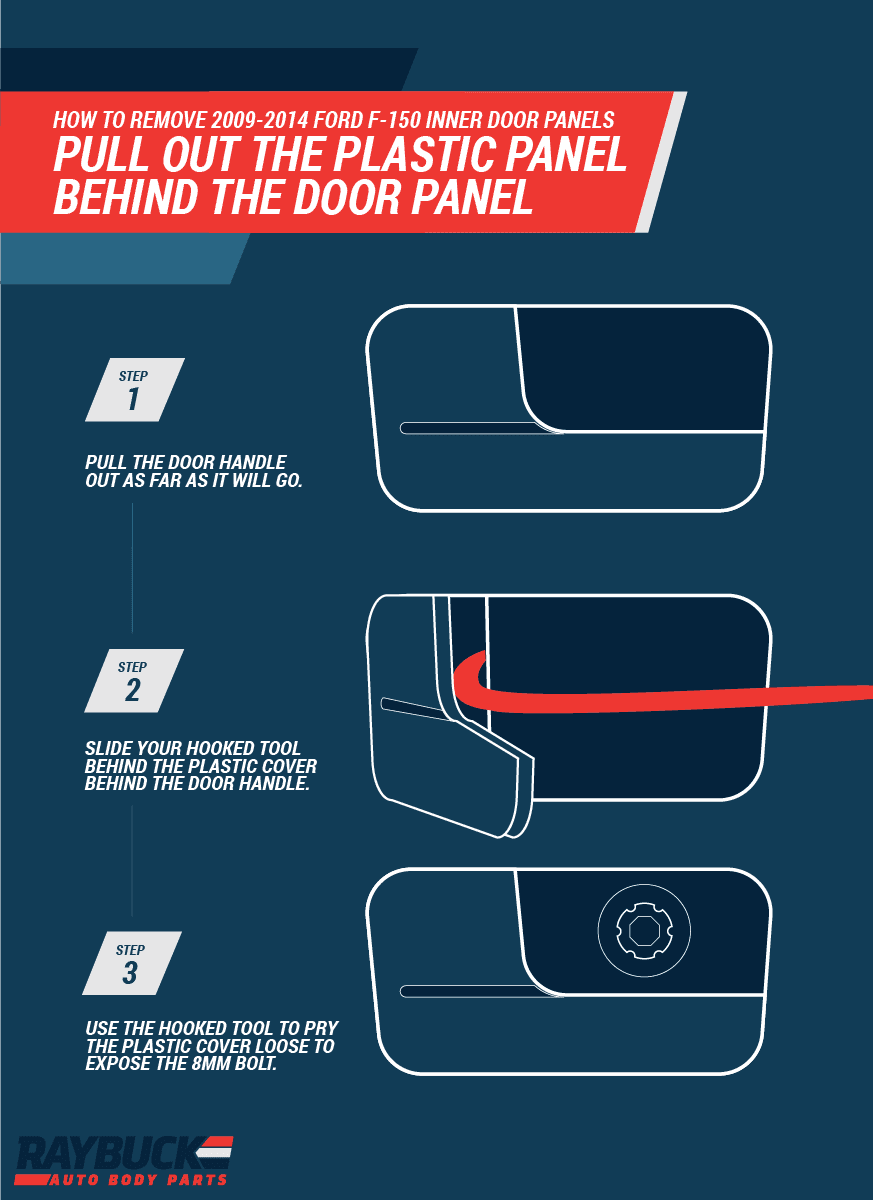
Pry up the small rectangular cover panel in the bottom of the door pull to access the bolt.
-
Remove the bolt using the 8 mm socket.
-
Pull out the plastic cover behind the door handle using the hooked/pronged tool by pulling the handle out and inserting the hooked tool behind it. A hooked tool will keep you from scratching the door panel around the handle.
-
-
Remove the exposed bolt using the 8 mm socket.
-
Remove the two bolts at the bottom of the door panel using the 6 mm socket.
-
Lift the door panel up to disengage the tabs that hold it in place.
-
Unplug the two connectors for the master window switch, the door lock switch and mirror switch.
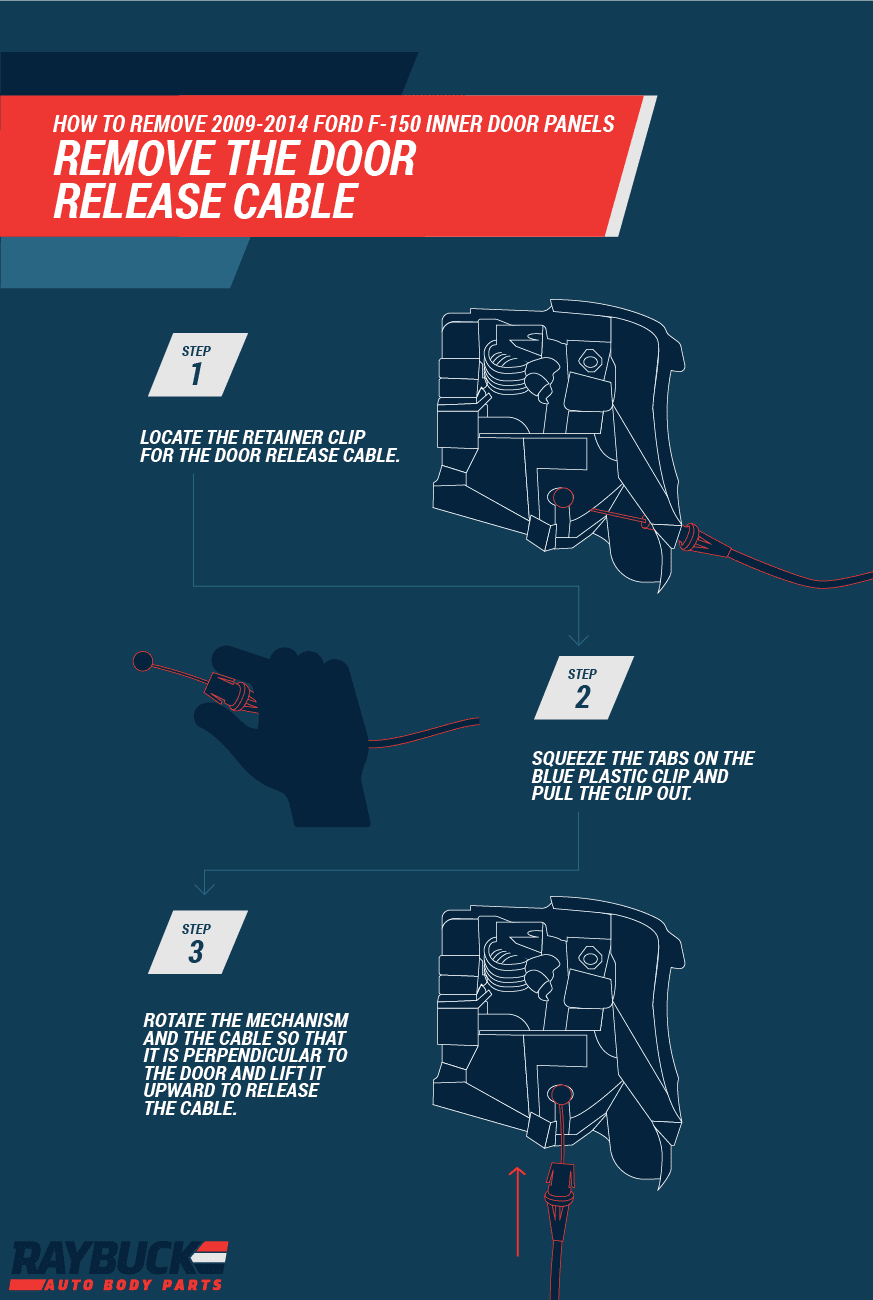
- Remove the door release cable by squeezing the tabs on the blue plastic clip, passing it through the hole and disengaging the cable from the handle.
You can now fully remove your door panel and set it aside. Re-install your 2009-2014 Ford F-150 door panel in the reverse order once you have completed your other repairs or speaker replacement.
Consider the following expert tips as you remove your Ford truck door panels:
- Never force your panel: If you feel significant resistance, stop to verify that all bolts are removed and your plastic tabs aren’t stuck. Try gently wiggling or seesawing your door panel to work it loose.
- Take care to use the right size socket on your bolts: The heads of these small bolts can easily be stripped, making it difficult to remove them or reinstall them afterward.
- Test all switches and connections before fully reinstalling the door panel: If your connectors aren’t properly engaged before you reinstall the panel, you will have to remove it again to attach them properly.
Tips for Common Repairs:
Once your inner door panel is off, you have access to the window, lift mechanism, speaker and other parts of your door. Here are a few tips for common repairs:
Window glass:
- When removing your window glass, make sure it is in the up position and secured in place — tape works well — so that you can unbolt the glass channel.
- During the removal process, it may be necessary to lower and raise the window slightly by hand — this is easiest if you have someone helping you.
- The bolts for the glass channel are located on red squares — for easy identification.
- If you are replacing a broken window glass, make sure you remove all pieces from inside the door with a shop vacuum.
Speaker replacement:
- Avoid touching the paper element during installation.
- Hand-tighten all four speaker bolts before securing completely to ensure proper seating and positioning of the speaker in the door.
Door handle mechanisms:
- When replacing your door handle, grease the mechanism to be certain it is moving freely.
- Take care in tightening all bolts during installation to avoid over-torquing and cracking your door panel or other hardware.
If you have any questions, our team is always happy to help.
We invite you to share your tips on 2009-2014 Ford F-150 door panel removal in the comments below!


Is there a second screw on the arm rest for the 2014 Ford 2014 xl model with manual door crank and local? I see a little cap in most doors but on this door
Perfect for removal. Pop the door lock knob guide out for easier reinstallation.
Mirror- if your replacing your mirror stop at step 3! You can easily slide your ratchet. (11 MM) between door panel and remove the three bolts. Gently pull the mirror from the outside. Remove the electrical plug and do it in reverse to install the new mirror.
If you’re replacing your mirror as I was you don’t need to do all the steps! Stop at #3. There’s enough give to reach the three 11mm nuts. Remove those 3 nuts then gently pull mirror from the outside. One push of the plug and the entire mirror comes off with ease.
A good guide except for a bolt that was missed. In the pocket behind the window switch is a square tab that needs to be popped out and behind it is another bolt that needs to be taken out in order for the panel to be removed.
There is a bolt in the door rest that wasn’t mentioned.
Thank you A Thousand Fold??
Absolutely spot on..