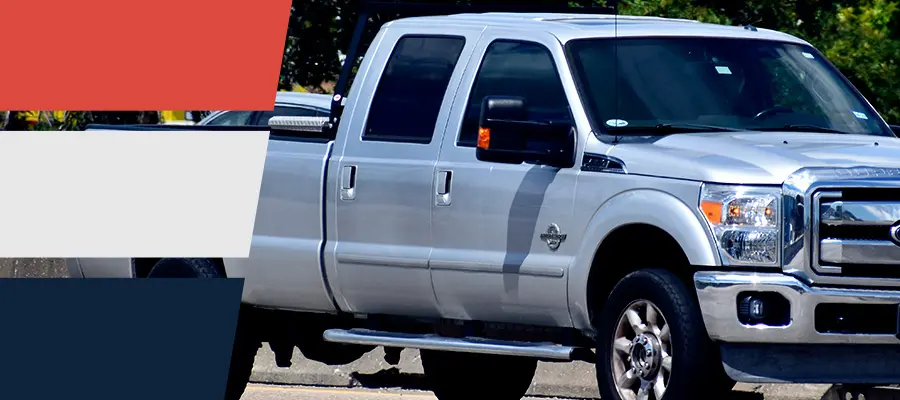
At Raybuck Auto Body Parts, we know rocker panels play a critical role in the strength and durability of a Ford Super Duty truck. These panels sit beneath the doors and help support the truck’s body while shielding it from road debris and corrosion. When rocker panels rust or become damaged, they compromise both appearance and structural integrity.
This installation guide walks you through selecting the correct replacement panels and provides clear steps for preparation, removal, installation and finishing.
Key Takeaways
- Rocker panels protect your Ford Super Duty from corrosion, debris and structural weakening.
- Proper preparation and accurate cutting are critical for a clean installation.
- Raybuck Auto Body Parts offers replacement rocker panels for 1999 to 2016 Ford Super Duty models.
- Test fitting before final attachment ensures correct alignment and professional results.
- Seam sealing, priming and undercoating help prevent future rust and extend panel life.
Did you know rocker panels are among the first body components to show corrosion because of their proximity to road moisture and debris?
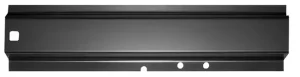
What Rocker Panels Are and Why They Matter
Rocker panels are body sections located along the lower side of a truck between the front and rear wheel wells. They help protect the truck’s underbody from moisture, salt, road debris and impact damage. Rocker panels also contribute to the vehicle’s structural rigidity by linking major body sections beneath the doors.
Failure of these panels due to rust can lead to softened metal, compromised structural support and accelerated body corrosion. On heavy-duty trucks like the Ford Super Duty, rocker panels are often among the first body parts to show rust and wear because of their location near the road surface. Proper installation of quality replacement rocker panels restores protection and helps maintain long-term body strength.
When to Repair or Replace Your Ford Super Duty Rocker Panel
Because of their position on the truck, the rocker panels take the most damage from years of wheeling across various terrains. These parts are often overlooked during maintenance, and damage is only noticed once telltale signs begin to show.
There are several visible cues to look out for. It’s time to replace or repair your rocker panels if you notice:
- Corrosion and rust: Rust is caused by a buildup of trapped moisture, road salt and debris. It causes severe structural damage over time, requiring repair or replacement panels.
- Soft spots: If the rockers are soft or crunch when pressed, the internal structure is damaged.
- Warped or misaligned panels: Uneven rocker panels indicate prior damage or collision repair.
- Seam separation: Gaps in rocker seams result from improper sealing and create hiding places for corrosion.
- Peeling or blistering paint: Bubbling or peeling paint can indicate the spread of rust underneath.
- Dents and scratches: Impact from rocks and debris can dent and damage the rockers.
To prevent damage and extend the lifespan of your rocker panels, inspect them often to stay on top of any changes in their appearance. After a muddy drive, clean your rockers of debris, then wipe them down to remove water. Also, have panels recoated with anti-rust coating and sealant regularly to discourage rust spread and corrosion.
Selecting Replacement Panels From Raybuck Auto Body Parts
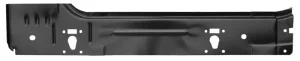
Raybuck Auto Body Parts offers a collection of quality rocker panels for many vehicles, including Ford Super Duty trucks from model years 1999 to 2016. These replacement Super Duty rocker panels are manufactured to fit your truck and are available online through our parts catalog.
Key Product Highlights
- Panels designed to fit 1999-2016 Ford Super Duty trucks
- Heavy-gauge steel construction for durability
- Replacement panels available for different cab styles and configurations
- Accurate fit based on OEM scanning to match original contours
Welded vs. Slip-On Rocker Panels
Depending on your preferences and the condition of your existing rockers, we offer two styles to either repair or replace the damage caused by wear and tear. Welded or full rocker panels are installed to replace your damaged rockers, while slip-on rockers fit over your existing panels. Each has its own advantages and drawbacks.
| Welded Rocker Panels | Slip-On Rocker Panels | |
| Durability | Restores structural strength and provides superior, long-term durability. | Less durable and can trap moisture, which accelerates rust spread if it’s not installed properly. |
|---|---|---|
| Installation | Requires removing damaged metal and welding the new panel in place. | Fits over the existing rocker and is secured with a superior adhesive. |
| Appearance | Flush with body lines and a seamless finish. | Slips over existing panels, but might not align with body lines and can show edges. |
| Repair time and cost | More expensive, requires skilled welding and takes more time due to labor intensity. | Less expensive and faster installation time, and can be done on your own. |
| Best suited for | Extensive rust and corrosion, long-term repairs and structural restoration. Ideal for high-value vehicles. | A quick cosmetic fix for minor rust and corrosion. Ideal for high-mileage trucks. |
| Considerations | A welded rocker is necessary if the Super Duty inner rocker panel is damaged. | Ensure the slip-on panel does not interfere when closing doors. |
A new rocker panel is an investment. To get the most value, prioritize safety, longevity and quality over the repair expense and aesthetics. Over time, a long-term solution will offer more value and resilience. Our expert auto body technicians can help you evaluate the damage and determine the best solution for your Ford Super Duty rocker panel replacement.
How to Choose the Right Panels
- Identify your truck’s model year, cab style and door configuration.
- Use the Raybuck product filters to select rocker panels for your vehicle.
- Review product descriptions to confirm fit and compatibility.
- Consult the Raybuck team via online chat or customer service if you need assistance with part selection.
Tools and Materials Needed
Before beginning rocker panel removal and installation, gather the following tools and materials:
Safety and Prep Tools
- Safety glasses, gloves and respirator
- Jack and jack stands or vehicle lift
- Tape measure and marker
Cutting and Preparation Tools
- Angle grinder with cutting and sanding discs
- Drill and metal drill bits
- Wire brush or rust removal tool
Attachment and Finishing Tools
- Welder or rivet gun, depending on attachment method
- Clamps to hold panels in place
- Seam sealer, primer and paint matching your truck
Having these tools ready before you begin will save time and help ensure a successful install.
Preparation and Safety
Proper preparation sets the foundation for a smooth rocker panel installation and ensures safety throughout the process:
- Secure the truck: Park on a level surface and support with jack stands to prevent movement.
- Disconnect battery: Remove the negative terminal to prevent electrical hazards while cutting or welding.
- Remove obstructions: Take off trim panels, mud flaps or other components that cover the rocker panel area.
- Clean and inspect: Use a wire brush to remove loose rust and paint around the panel area to clearly see where to cut.
- Mark cut lines: Use a marker to outline the section of the old panel that will be removed. Accuracy at this stage simplifies alignment of the new panel.
Following these steps helps protect the surrounding bodywork and provides clear visibility for cutting and fitting tasks.
Step-By-Step Rocker Panel Removal
Removing the old rocker panel material requires patience and precision:
1. Cut out the Old Panel
Locate the factory spot welds along the rocker panel flange and drill them out using a spot weld cutter such as a Blair Rotabroach 3/8 inch kit. Removing the welds first allows you to separate the original rocker panel cleanly from the underlying structure without damaging surrounding metal.
After the welds are released, use an angle grinder to cut along your marked lines where necessary. Follow factory seams whenever possible to preserve solid metal. Once the rusted panel is removed, inspect and prepare the exposed inner structure for installation of the new rocker panel.
2. Clean the Exposed Area
After cutting, remove rust, debris and paint using a wire brush or grinding disc. Cleaning the metal back to bare steel provides a solid surface for welding or attaching the new panel.
3. Check Structural Soundness
Inspect the floor pan, rocker inner support and adjacent frame areas. If rust has spread further than expected, additional repairs may be necessary before installing the new panel.
4. Test Fit New Panel
Position the replacement rocker panel from Raybuck to ensure it matches the contours and edges of the cut area. Minor trimming may be required for perfect alignment.
Installing New Raybuck Rocker Panels
With the old panel removed and the area prepared, you are ready to install the replacement rocker panel.
1. Align the New Panel
Place the new rocker panel in position and adjust until gaps match the truck’s body line evenly. Use clamps to hold it securely.
2. Attach the Panel
Use the preferred method for securing the panel to the truck:
- Welding: Tack weld at multiple points first, then complete the weld around the perimeter.
- Rivets or bolts: Drill holes through overlapping metal and fasten with rivets or bolts.
Check your alignment again as you attach to avoid shifting. Taking time here helps maintain a clean final appearance.
3. Finish and Smooth Attachment Points
Once secured, grind any welds or edges smooth and clean the surface to prepare for corrosion protection.
Finishing Touches and Corrosion Protection
Protecting your new rocker panel installation from future rust is important:
- Apply seam sealer to all seams and joints between the new panel and existing body.
- Prime the repaired area with quality automotive primer.
- Paint your truck to match using multiple thin coats for a durable finish.
- Consider undercoating the rocker area to block moisture and debris in the long term.
These protective measures help keep corrosion at bay and ensure the panel lasts for years.
Final Checks and Maintenance Tips
After installation, complete the following checks:
- Confirm all fasteners and welds are secure.
- Inspect seals and seam sealer coverage.
- Wash and inspect the rocker panel area regularly for chips or damage.
- Touch up paint or primer where needed to prevent rust from returning.
Routine inspection and maintenance prolong the life of the repair and keep your Ford Super Duty looking its best.
Conclusion: Ford Super Duty Rocker Panel Installation
Replacing your rocker panels with quality parts from Raybuck Auto Body Parts restores structural performance and long-term protection for your Ford Super Duty. Follow this guide to complete your installation confidently and explore our online catalog for the right parts for your project.
Find the right replacement rocker panels for your Ford Super Duty today at Raybuck Auto Body Parts and restore your truck with confidence. Contact us with any questions.
Further Reading
- How to Fix Rocker Panels on Your Truck Without Professional Help: Step-by-step guidance from Raybuck Auto Body Parts covering rocker panel repair and replacement basics for truck owners.
- Corrosion Basics: Technical overview of how corrosion forms on metal and why protective coatings matter.


