Classic Volkswagens remain distinctive. Their curves, practical engineering and body styles attract restorers decades later. Time can leave a Beetle, Super Beetle or Volkswagen Bus with rust, dents and weakened sheet metal.
Volkswagen restoration panels replace damaged metal with sections shaped for a particular model and year range. At Raybuck Auto Body Parts, we offer Volkswagen repair panels and restoration parts that help owners restore appearance and function without replacing more of the body than necessary.
Key Takeaways
- Volkswagen restoration panels replace damaged or corroded sheet metal with model-specific sections.
- Inspect visible surfaces, seams and hidden panel areas to determine the full extent of corrosion.
- Confirm the model, year, body style, panel location and vehicle side before ordering.
- Test-fit replacement panels carefully before welding or using an approved panel adhesive.
- Protect finished repairs with primer, seam sealer, undercoating or cavity wax as appropriate.
Did you know? A small visible rust hole may be surrounded by a much larger area of thin or pitted metal, so always inspect beyond the obvious damage.
Why Volkswagen Restoration Panels Matter
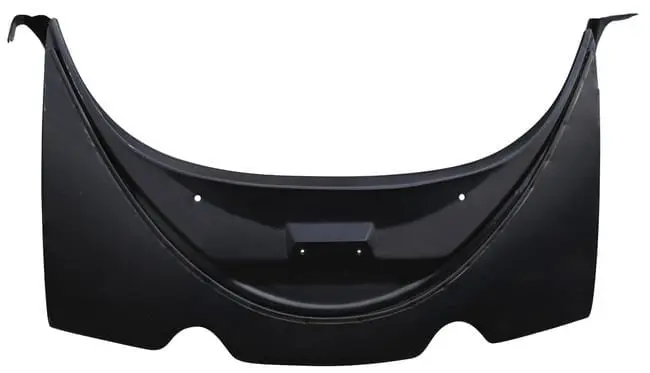
Rust often begins quietly. Moisture, road salt and debris can collect inside seams, wheel openings and body cavities. Surface oxidation may develop into pitting, bubbling paint or holes through the metal.
Covering corrosion with filler does not remove the affected steel. A restoration panel makes it possible to cut away damaged material and install sound metal. Depending on the location and extent of damage, the repair may use a small patch or a complete panel.
Addressing rust early can limit its spread and protect nearby metal. Our beginner’s guide to rust repair body panels explains the stages of corrosion and how to decide whether an area should be ground, patched or replaced.
Areas to Inspect on a Classic Volkswagen
Start with the exact model, production year and body style. A standard Beetle, Super Beetle, T1 Transporter and T2 Transporter do not use all the same components. Our Volkswagen models by year range guide helps identify the appropriate category.
Check visible surfaces and reverse sides of accessible panels. Corrosion may develop inside seams before becoming obvious outside. A small hole can be surrounded by thin or pitted metal.
Common Panel Areas in Raybuck’s Volkswagen Catalog
| Volkswagen application | Panel areas available to inspect and repair |
| Beetle and Super Beetle | Floor pans, frame heads, lower door skins, hinge pillars, aprons, fenders and wheelhouses |
| T1 Volkswagen Bus | Battery trays, nose panels, rocker panels, crossmembers, outriggers and floor panels |
| T2 Volkswagen Bus | Rocker panels, nose sections, fender sections, wheel housings and crossmembers |
These areas are represented in our catalog, but every Volkswagen will not experience damage in each location. Vehicle history, storage, climate, drainage and previous repairs influence condition.
Choosing the Correct VW Restoration Panel
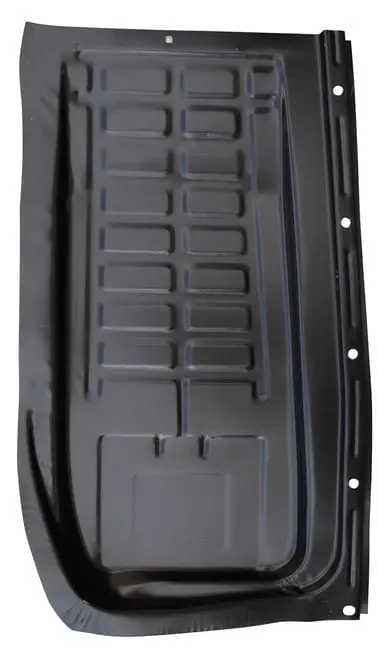
Accurate fitment begins before cutting. Record the model, year, body style, repair location and side. Determine whether the project requires an inner panel, outer panel, partial patch or complete replacement section.
Use the product description to compare:
- Stated model and year fitment
- Driver-side or passenger-side placement
- Body lines, flanges and mounting points
- Inner, outer or complete-panel construction
- Adjacent areas that may also require repair
Inspect surrounding metal before ordering. A damaged rocker edge may be accompanied by deterioration in an adjoining floor or support. Planning related repairs together can reduce repeated disassembly.
Browse model-specific collections for 1947-1967 Volkswagen Beetle repair panels, 1968-1979 Volkswagen Beetle repair panels, 1950-1967 Volkswagen Transporter T1 panels and 1968-1972 Volkswagen Transporter T2 panels.
Preparing and Installing Replacement Panels
Wear eye, hand and respiratory protection, plus correct welding protection when applicable. Remove trim, carpeting, seals and nearby components needed to expose the repair area. Protect wiring, glass and vulnerable parts from sparks and debris.
Strip paint and undercoating to reveal the corrosion boundary. Cut back to solid metal instead of attaching a new section over weak edges. Clean and treat adjoining material according to the products and repair process used.
Before permanent attachment, test-fit and clamp the panel. Confirm body lines continue smoothly, mounting points align and relevant doors operate without rubbing. Repeated fitting and trimming can prevent alignment problems.
Welding is commonly used for replacement sheet metal, especially in supporting or structural locations. Manufacturer-approved panel adhesive may be suitable for certain outer, nonstructural panels, including some door or quarter skins. Our auto body panel adhesive guide covers preparation, clamping and curing. Follow the adhesive manufacturer’s directions and applicable repair procedures. Seek professional assistance when corrosion is extensive or the repair affects structural alignment.
After attachment, smooth the repair and protect the metal with an appropriate primer, seam sealer and paint system.
Protecting New Panels From Future Corrosion
A finished exterior is only part of a lasting repair. The hidden side, overlapping flanges and seams also need protection. Depending on the location, finishing may include epoxy primer, seam sealer, undercoating and cavity wax.
To help protect completed work:
- Seal repaired seams on both sides when access allows.
- Apply cavity wax inside enclosed sections through suitable access points.
- Rinse wheel wells and the undercarriage after exposure to road salt.
- Repair paint chips before corrosion develops around them.
- Keep drain openings clear and inspect repaired areas regularly.
- Replace deteriorated seals that allow water to reach interior metal.
Owners working around windows and body openings can browse our Volkswagen Beetle weatherstripping when damaged seals are part of the project.
Plan the Restoration Before Starting
List every damaged panel and inspect adjoining structure before ordering. Grouping repairs helps establish a sensible sequence and identify the tools, coatings and attachment products required.
For additional options, compare our broader selection of rust repair panels and patch panels. Confirm every product’s listed fitment before beginning disassembly.
Keep Your Classic Volkswagen in Shape
Rust repair is most manageable when damage is found early and assessed completely. With the correct Volkswagen restoration panels, careful fitting and thorough corrosion protection, owners can replace deteriorated metal while preserving the recognizable form and function of their classic VW.
Further Reading
- Panel Bonding Repair Tutorial: Review 3M’s recommended process for preparing, fitting and installing appropriate replacement panels with panel-bonding adhesive.
- Autobody Repair and Refinishing Hazards: Learn about common safety hazards involving welding, chemicals, solvents and respiratory exposure during body repair work.
- VW Beetle Through the Years: Review the development of the classic Volkswagen Beetle and its design changes across different production periods.