If you’ve replaced any of the sheet metal on the front of your 1st Series (Advance Design) GM truck, then you know how challenging it can be to get it to align when putting it back together. We found this out first hand when building our 1953 Chevy pickup. We kept the original hood, but replaced the hinges, and also replaced the the front fenders, inner fenders, rad support and grille. We thought putting it together would be fairly simple as it was all just bolted together. Well, there are around 20 bolts that hold the front clip and hood on, and they all need to be aligned just right or else you’ll end up with uneven gaps and/or a hood that won’t latch. If you don’t re-install the inner fender cross brace rods (that run on an angle from the center of the firewall to the middle of the inner fenders), as is common practice when customizing these trucks, then alignment gets even harder. I’m not sure what the engineers were thinking when they designed this, but having a bolt pass through three panels does not allow for easy alignment.
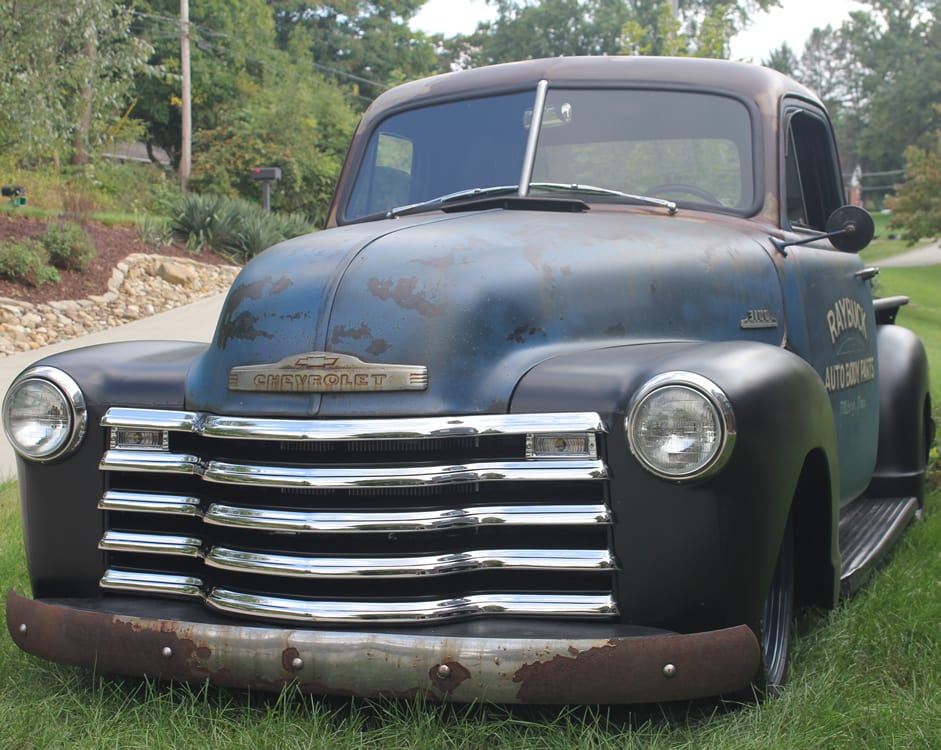 After spending two days trying to get everything to align, and feeling like we were just making things worse, we ran across an old Chevrolet service manual that actually explained how to properly align the hood (which also helped align the fenders). The grille was a completely different beast, but we’ll leave that for another article.
When starting this project keep in mind that nothing fits. Yes, even from the factory nothing on these trucks seemed to fit that well. You can take apart an original truck, put it back together, and you’ll have alignment problems. Add aftermarket panels into the mix and be prepared to ream some holes. With that in mind, here are the steps to align the hood. Follow these if the hood is already on the truck. If the hood is off of the truck, then you can obviously skip a few of these steps.
- Loosen all bolts in the front clip (literally all of it, including the rad support). This will allow you to adjust the hood and then adjust the fenders to get the correct gap along the top and the cowl.
- Remove the hood latch plate that’s located in front of the radiator. Removing this will allow the hood to close all the way without any interference which will make it easier to align.

- If you are keeping the fender cross brace rods, the left should measure 27 1/4″ and the right should measure 27″, with the measurement taken from the center of the bolt head to the head of the bracket.
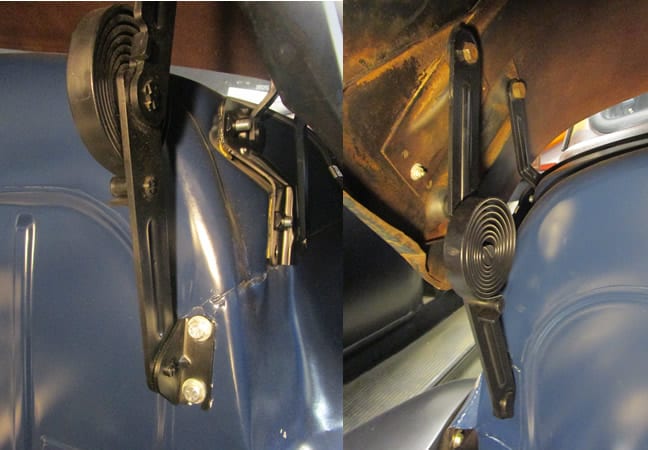
- Disconnect the hood spring supports from the hood (you can leave them attached to the firewall), wrap them in a rag so they don’t scratch the firewall, and let them hang. Loosen the bolts that attach these to the body to allow for adjustment when fitted back up to the hood.

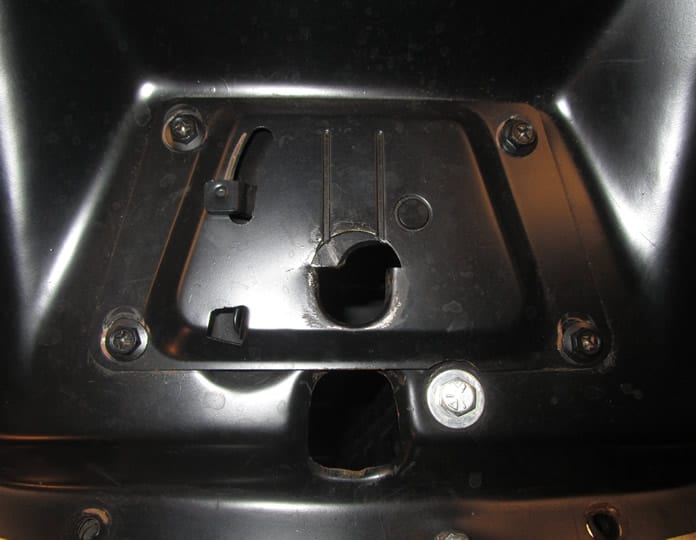
- Loosen the outer hood-hinge bolt on both sides (this bolt would be located in the lower open hole shown in this pic).

- Loosen the two inner hood-hinge bolts on both sides. Only loosen them enough to allow for slight movement in the hinge as these are holding the weight of the hood when it’s open.
- Place a 4″ block of wood under the nose of the hood to support it. (This step is critical because if you don’t raise the front of the hood then it will be very difficult to get the hood to sit properly. Without propping the front up first, the rear of our hood kept sitting around 2″ off of the cowl when everything was tightened.)
- This step is easier with two people. Push the rear of the hood down and back so that it’s pressed against the cowl weatherstripping. You’ll want to get it as tight as possible because the hood hinges are going to want to push up on it. While maintaining down and backward pressure, tighten the two inner hood-hinge bolts on both sides. (If you are trying to do this by yourself, a ratchet strap can help maintain pressure on the hood while you’re tightening the bolts.)
- Remove the 4″ block and lower the hood. If you got lucky, the hood will fit tightly across the cowl seal and the gaps will be perfect along the cowl and the fenders. For the 99% who don’t experience this miracle, the following alignment adjustment techniques will be helpful.
- If the hood sits too high, or sits uneven, you may need to adjust the hood hinges. There is a bump in the firewall that helps align the hood hinge. You may need to remove this bump to allow the hinge to lower. If you remove this bump, you may also need to slightly ream the hinge holes in the cowl and possibly the inner hood-hinge holes as well.
- If the hood fits along the cowl but has an increasing gap along the front of the fenders, try shimming the radiator support by adding shims between it and the chassis cross member.
- If the hood fits along the cowl and fenders but has a gap between the nose and the grille, try shimming the top of the grille by adding shims between it and the center grille support bracket.
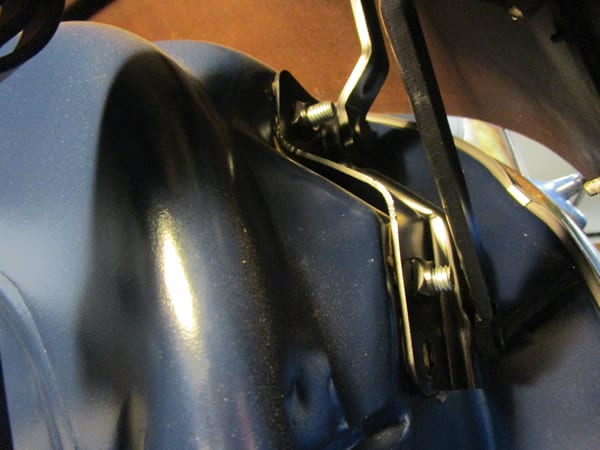
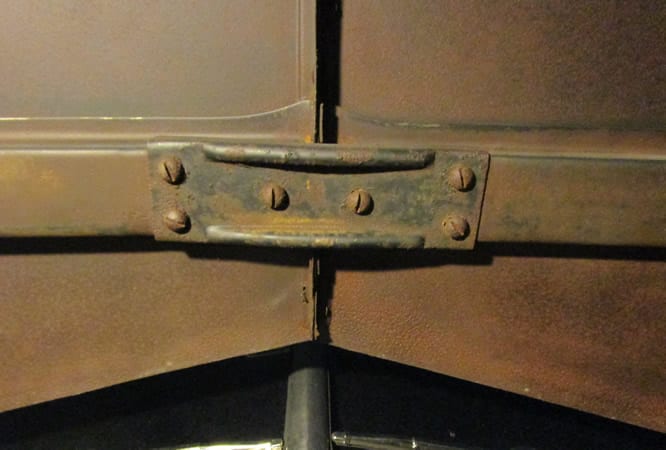
- If the hood touches the outer edges of the cowl seal but has a gap towards the middle of the cowl, you can try adjusting the center bracket located at the rear of the hood. Remove the two outer screws on each side and loosen the two inner screws on each side. Pry the outer ends of the bracket away from the reinforcement piece and shim out evenly with washers on both sides. Re-install the outer screws through the washers (so that the washers don’t fall out) and tighten all screws. This will help bring the rear center of the hood down. Is there is still a gap after this adjustment, you can try shimming under the cowl seal.

- Once the hood gaps look good, raise the hood and tighten the outer hinge bolts on both sides.
- Attach both hood supports to the hood and then tighten the hood support brackets to the firewall as well.
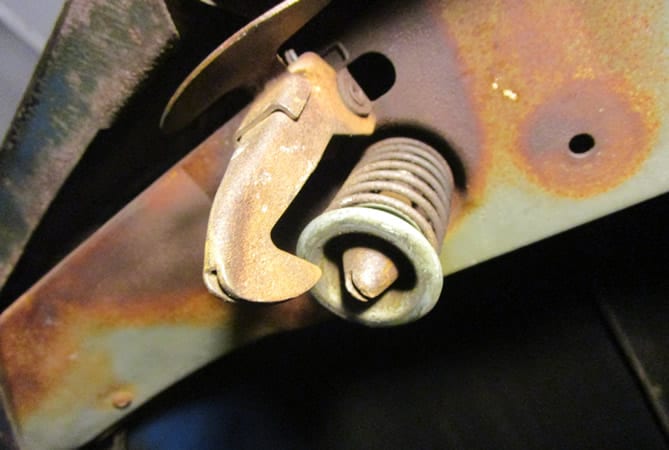
- Install the hood latch plate in the farthest rear position as possible and snug. Gently lower the hood to the closed position so that it locks in place. If it locks in place, raise it, move the hood latch plate forward 1/32″ and tighten the hood latch plate screws completely. (The hood lock stud is adjustable. If the hood doesn’t lock when fully closed, adjust the lock stud until it does.)

- Once the hood is locked into position, adjust the fenders as necessary to get the proper gap. At this point the only fender adjustment that should need to be made is towards the rear.


Great info.!
Thank you for taking the time to help others.
I was able to align and fit the hood pretty good on my 1951 Chevy truck, with your thread up top! Thanks
However now I’m finding that the front of the fenders are not sitting properly, there is a 2 inch difference in the right to left. The right fender towards the front is higher then the left. So when looking at the front from a distance you can see the front fenders are sitting slanted. I have aftermarket front fenders and hood!
Any advice how to level out the front fenders so they sit evenly?
The front clips on these trucks are difficult to align, to say the least. For the front fenders, I would look at the radiator support first. It may need to be shimmed, or the fender mounting holes reamed. I would loosen all of the bolts that connect to the rad support, grille, and fenders and then start working it. We had a similar problem and found that we should have left most of the bolts just shy of finger tight while putting all of that together.
My hood is 1″ extended past front fenders. I have 3/16 hood gap at cowl which looks good. Roynd latch assby is 1″ from being centered in the hole. All bolts have been loostened. I cant ream 1″ of metal on my fender holes. All original front end from the truck.HELP PLEASE.
Hey Rick. We had a similar problem when first installing our hood. We ended up loosening the fenders, grille and rad support, as well as reaming the hood hinge holes. Loosening the rad support and grille seemed to make a big difference.
my hood latch pin sticks and I have to pry the hood open, against the new repop grille. not comforting to do. the latch plate is loose underneath. the hood gap at the cowl looks good. inner fenders and fenders are original. my hood is not original to the truck, but is an original hood
Did you try adjusting the hood latch (this piece https://raybuck.com/product/1947-1955-chevy-pickup-hood-latch-1st-series/)? I think I had to ream a few of these holes to get mine to unlatch properly.
does the passenger side inner fender have a bracket between firewall and the inter fender or just the driver side because of the E-brake
Just the driver side because of the e-brake.
My hood flares out at the sides. I’m assuming I just need to keep lowering the hinges to bring the sides in?
Is it flared out along the cowl, or along the entire length of the fenders? We adjusted our hinges lower to help bring the hood down along the cowl, as it was sitting too high. We didn’t have any issues with the hood being too wide an any area.
At the cowl. I would think lowering the hinges should help….
I had to lower the hinge on the passenger side considerably. I got well acquainted with my rat tail fail and hammer to do it. Getting all this stuff lined up is quite a job. Be prepared to walk away from it for a bit when you get frustrated. I would be sure to put the grill in before starting (loosely, every bolt loosely). I tried to put the grill in after I had got the hood and fenders decently aligned and found the grill opening to be several inches too small. I had to loosen everything back up and start over. On the picture of your truck I notice the passenger side of the top grill bar sits low on the fender. I have the exact same issue. The driver side grill bar covers the fender holes and lines up decently but the passenger side grill bar sits low and shows the fender spot welds and almost sits at an angle on the headlight area of the fender. Weird, its all weird.
Can you just come over and align mine? I will buy the beer and pizza!!
Ha, it would take a lot of beer and pizza!
i have a gap between hood and passenger fender. looks like whole fender needs up 1/4″ but no room at bottom of cab side is tight and gap at front between hood looks like it needs to come out 3/16 any suggestions would be appreciated.
It’s hard to say without seeing it. If the hood is resting on the cowl, then the fender mounting holes may need to be reamed a bit. If the back of the fender is tight against the cab, then the front mounting holes may need to be reamed. I would keep all bolts on the fenders, inner fenders, rad support, grille, etc. hand tight until you get things aligned. There are so many adjustment points in that front clip that even having just a few bolts tightened up can cause alignment problems.
Thank you for this detailed article. I have followed the majority of the steps minus disconnecting the spring/hinges before using a block of wood. My hood latches but I may have to start from scratch and follow your article step by step. I have two problems. When my hood is open the rear of the hood sits over the original antenna hole so I can’t currrently remount my antenna. My other issue is the front/leading edge of my hood sits about 1/2″ in front of my fenders. Maybe I have to ream out all my fender holes and try to move my fenders forward. Any advice would be much appreciated.
Did you replace the front fenders, or remove and re-install them? If so, you may have to loosen them and adjust forward. We had that problem.
Steve thanks for your response and advice. I did install new fenders and inner fenders wells. I may have to attempt to move my fenders forward.
Thanks a lot for that. Very helpful.
I have gone through these steps but the middle hood is too tight against the cowl i
and I have nicely peeled the paint off. The hood will also not latch. Can anyone help me here?
Hi Roger. Have you tried adjusting the mechanism that is located under the hood and between the two hood panels towards the cowl side? I recall reading about this adjuster and how it could help even the gap along the cowl.
Where in relation to each other, do the hood rubber bumpers go? There are 3 different sizes.
Hi Mike. There should be 6 rubber bumpers of the same size. Three go along each side of the hood, attaching to the hood and not to the fender. There may have originally been one or two rubber bumpers on the hood latch panel. We didn’t install any there, and I didn’t get a chance to reference the shop manual to see if there were any there.
My truck has a gap between the cowl and hood it sits down properly but has a 1′ gap between the those two spots
Hey Royce. It sounds like the hood hinges might need to be adjusted. We had to ream out the holes a bit to get our hood to sit back properly.