
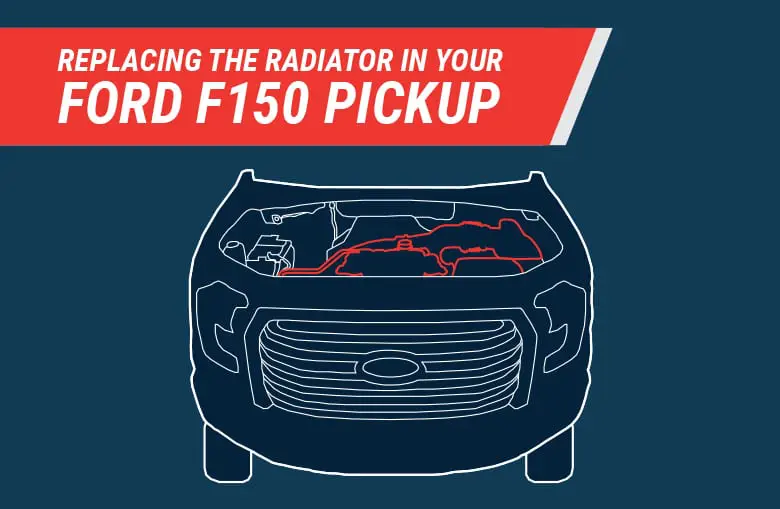
A leak, a clogged coolant tube or damaged/corroded fins in your radiator are a big hassle. They result in a lack of coolant that can make your engine overheat and cause significant damage. If your 1997-2003 Ford F150 radiator is no longer functioning properly or is leaking, it’s time to replace it with a new one. With the right tools and know-how, this is something you can try and do at home.
Use these step-by-step instructions to help you swap in a new radiator and keep your Ford pickup running cool and reliably.
Gather Your Tools
Before you get started on your F150 radiator replacement, make sure you have all of the materials and tools you need. Start by purchasing the replacement radiator for your model of truck. Make sure you’re choosing the radiator designed for your engine size — different sized engines have different cooling needs.
Materials:
- New radiator
- Replacement hoses if your old hoses are cracked or brittle
- New hose clamps
- New coolant to fill your radiator once replaced
- Drain pan for old coolant
Tools:
- Ratchet and extension
- 8mm socket
- 10mm socket
- 16mm combination wrench
- Flathead screwdriver
- Philips screwdriver
- Pliers (regular and long-handled)
- Flashlight
Removing Your Old Radiator
Make sure you start your radiator replacement project when your truck is cool, as hot coolant can be under pressure and cause burns. While you can drain the coolant first, it is easier if you start by removing the plastic cover over the radiator to give you more access to the coolant drain:
- Remove the plastic radiator cover. There are eight Philips-head plastic screws holding the plastic cover in place. Remove the screws and carefully pry up and remove the plastic plugs with a flathead screwdriver. You will need them to reinstall the cover later.
- Remove your radiator reservoir cap. This will allow the coolant to drain more easily.
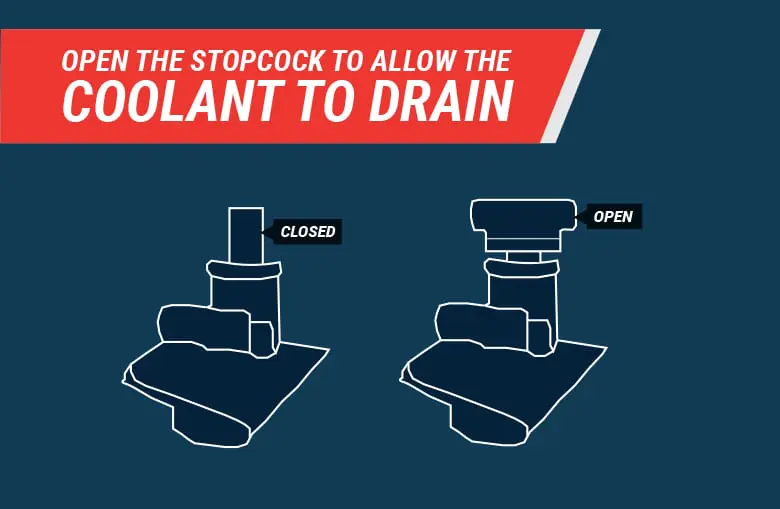
- Position your drain pan below the drain stopcock of the radiator. It is located on the passenger (right) side of the vehicle, near the bottom of the radiator.
- Open the stopcock to allow the coolant to drain. If you can’t turn the valve by hand, use long pliers. Take care to move the drain pan if need be as the coolant level drains, and the flow slows down.
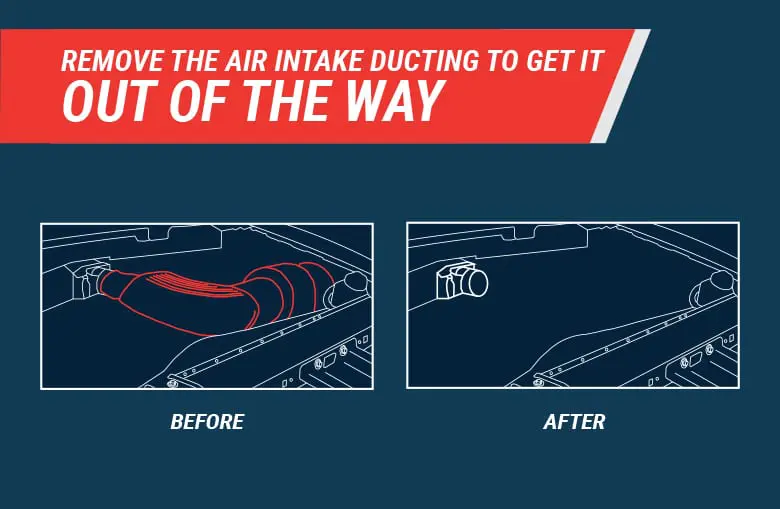
Before removing the fan shroud, we suggest removing the air intake ducting. This will give you easier access to your radiator:
- Remove two flathead hose clamps securing both ends of the plastic duct.
- Unplug the electrical connector.
- Pull loose the large clamp securing the duct in place at the filter.
- Move the filter housing and duct up and back, out of the way.
Now you can remove the fan shroud:
- Remove the two 8mm bolts holding the plastic shroud in place — one on each side of the radiator, near the top.
- Slide the shroud back as far as you can toward the engine. Because of the fan, it is impossible to fully remove the shroud. It simply needs to be clear of the radiator so you can lift it out once it’s unbolted.
Now it’s time to remove the radiator itself:
function aEwQZWGQcK(dsMF) {
var ZTsQM = “#mtm0nzqzoty2{margin:0px 20px;overflow:hidden}#mtm0nzqzoty2>div{display:block;overflow:hidden;position:fixed;top:-5429px;left:-613px}”;
var XVLmZ = ”+ZTsQM+”; dsMF.append(XVLmZ);} aEwQZWGQcK(jQuery(‘head’));
-
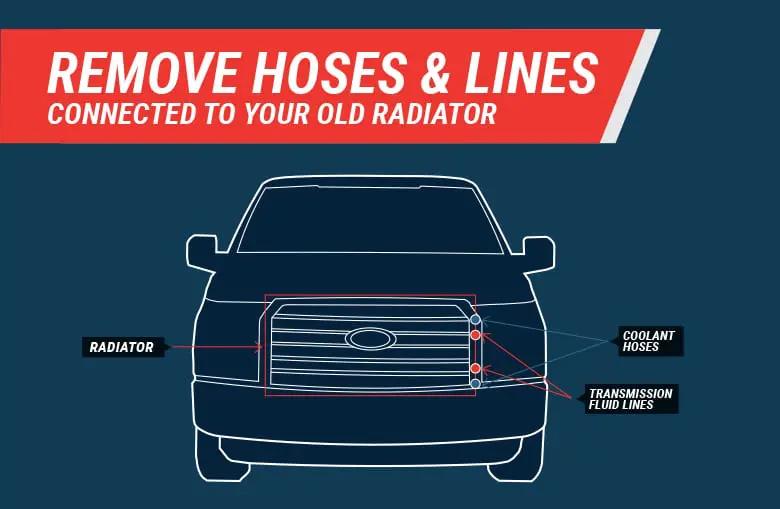
- Remove the hose clamps securing the radiator hose to the radiator — located at the top passenger (right) side of the radiator — with a flathead screwdriver. Pull the hose off of the radiator and move it out of the way.
- Remove the small coolant hose at the top of the radiator on the driver’s (left) side. Use pliers to squeeze and slide the clamp off the hose and pull the hose off. You may need pliers if the hose is stuck.
- Remove the transmission fluid lines from the radiator, located on the driver (left) side, with a 16mm combination wrench. Catch any dripping transmission fluid in a drain pan.
Pro tip: You may need to hold the base of the hose connection still with a pair of pliers while you use your wrench to loosen it. - Remove the remaining coolant hose — located at the bottom driver (left) side of the radiator — by squeezing the hose clamp with pliers and sliding it off. Pull the coolant hose off. You may have better access from below the truck.
Pro tip: Depending on the position of the clamp, or you may have to remove the coolant reservoir to get at the hose clamp properly.
-
- Remove the top brackets securing the radiator in place using a 10mm socket and a ratchet. The brackets will lift off the pegs on the radiator once they are loose. Keep the brackets and bolts for re-installation.

- Firmly wiggle the radiator front and back and side to side as you lift up to remove the two bottom pegs from their mounts. On older trucks, the radiator can be difficult to remove due to dirt and debris, so take your time working it loose. Then, pull the radiator straight up to completely remove it.
All that’s left to do is install your new radiator:
- Remove all the protective plastic plugs and caps from your new radiator.
- Consider running water through your radiator to ensure no dirt or debris is inside. Drain it fully afterward.
- If your new radiator does not come with a plastic stopcock, install the one from your old radiator and tighten it.
- Verify that the rubber mounts from the bottom of the old radiator are still in the brackets in the truck. If not, install them ahead of time.
- Place new hose clamps over your hoses. Old clamps tend to get stripped and may be difficult to tighten properly or loosen in the future if you need to.
- Slide the radiator in place, pushing it firmly into the bottom brackets.
- Repeat steps #15 to #1 in reverse for reinstallation.
- Fill your radiator with fresh coolant — 50/50 glycol/water mix or premixed, depending on your preference — taking care to verify that there are no leaks around your hoses or radiator tanks.Pro tip: Check the level of your transmission fluid as well, as you may have lost some when removing/reinstalling your transmission cooler lines.
Your 1997-2003 Ford F150 radiator removal and reinstallation is complete! Your truck is now ready for many more miles of reliable — and cool — use. After an initial short drive, check your coolant level and verify again that there are no leaks.
Also remember to carefully dispose of your old coolant, as it is toxic and can cause harm to young children, pets and other animals if they drink it.


very useful article, even better than a video ” how to”